Blade Installation Guide
Watch the video tutorial or follow the user guide below:
Copy and deploy the AppsScript Project
To install Blade, you'll need to copy and deploy the Apps Script project. This gives Blade a place to store its code and run the automatic processes and connects it to your Gmail account.
1. Open this link. Ensure that you're logged into the Gmail account where you want the add-on installed.
2. Click on the “Copy” button in the top-right corner to copy the project.

3. Click the "Deploy" button at the top right and then, choose "Test deployments" from the list that appears.

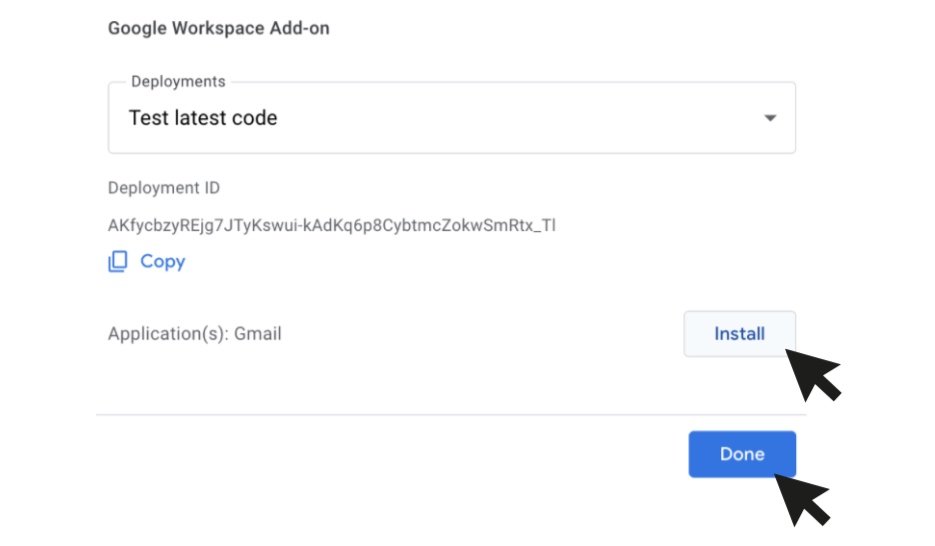
4. Click “Install” in front of the “Application(s): Gmail” and then click “Done”. You have now successfully installed the add-on.
2. Authorize the add-on
This is a final step. You are going to authorize Blade to work with your Gmail account.
1. Login to your Gmail Inbox or refresh your browser page if you’re already logged in (make sure to use the same credentials you used for the AppsScript project).
2. Click on the arrow (<) at bottom right to show the side panel.

3. Click on the “Blade” icon on the side panel.

4. Click “Authorize Access” in the new panel window.

A new window will pop up. Choose the account you used to make the AppsScript Project. Then, hit "Allow" when it asks for permission.
6. Go back to your Gmail inbox, and your add-on will be all set for you to use :)


3. Setting up Blade
The Blade Gmail add-on categorizes unwanted emails, lets you archive them, and offers ways to respond to the sender.
Let us go through each input control and specify its role in configuration:
Turning off 'Auto Archive' labels emails but doesn't remove them from your inbox.This checkbox allows Blade to only scan your primary inbox.With an hourly trigger on, Blade will automatically check for unwanted emails every hour.These settings let you automatically reply to senders of labeled emails. There are two parts: a checkbox for auto-reply and a text box for your reply message. Your auto-reply will only be sent if the checkbox is ticked.You can run the process at any time by opening the add-on and clicking ‘Process Now’.